

50s house interior ideas for a period-aware modern remodel
What defines a 50s house interior?
A 50s house interior usually combines postwar practicality with mid-century optimism: simpler room layouts, efficient kitchens, built-in storage, picture windows, colorful surfaces, and furniture with clean, low profiles. It was never one fixed style. A modest ranch house, an updated Cape Cod, and a high-design modernist home could all belong to the 1950s. What they often shared was a shift toward easier family living, less formality, and a closer connection between kitchen, dining, living, and outdoor space.
For today’s homeowners, the strongest approach is not to turn every room into a stage set. It is to identify what is original, preserve the pieces that still work, and add modern comfort without erasing the house’s proportions. For more home design context, browse the Home & Interior section.
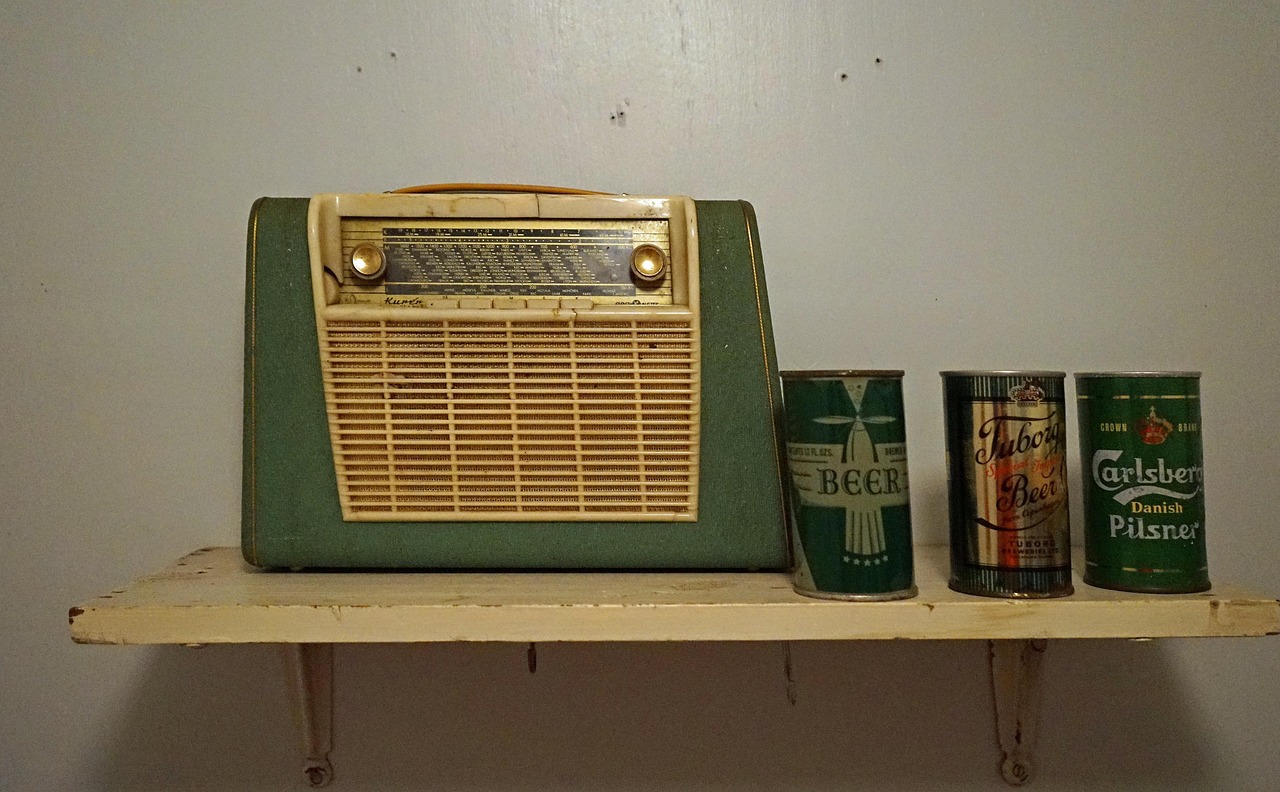
The postwar house shaped the interior
The 1950s interior cannot be separated from the post-World War II housing boom. In the United States, suburban growth, expanding car ownership, federally supported mortgage systems, and mass-market building methods changed how many families lived. The National Park Service has identified the 1950s ranch house interior as a useful cultural record of mid-twentieth-century suburban life, not just a backdrop for furniture.
That context matters because many familiar 50s design choices came from practical domestic planning. One-story ranch layouts reduced stairs. Attached garages and carports changed entry patterns. Patios and sliding or large glass doors made the backyard part of everyday life. Kitchens became command centers rather than hidden service rooms, although the period still carried a strongly gendered view of domestic work.
The result was a house that often felt lower, wider, and more casual than many prewar homes. Formal front parlors gave way to living rooms organized around television, conversation, and family activity. Dining rooms still existed, but breakfast nooks, pass-throughs, and eat-in kitchens became increasingly important. These planning ideas are among the most valuable features to protect in a remodel because they explain why the interior feels mid-century even before paint or furniture is added.
Room-by-room features worth noticing
Living rooms
In many 1950s homes, the living room was the public face of modern comfort. Look for picture windows, brick or stone fireplaces, low ceilings, compact footprints, and a direct relationship to dining or outdoor areas. In more modernist examples, a large glass wall or clerestory window brought daylight deep into the room. In more traditional homes, the mid-century character may be quieter: simplified trim, hardwood floors, and furniture scaled lower than earlier overstuffed pieces.
When updating a living room, preserve the horizontal emphasis. A long sofa, a low credenza, and a simple coffee table usually suit the architecture better than tall, heavy furniture. If the fireplace has original brick, stone, or tile, avoid covering it before checking whether it is a defining feature. Careful cleaning or limewash may be less destructive than full replacement.
Kitchens
The 1950s kitchen is one of the most recognizable parts of the era. It was marketed as efficient, cheerful, and technologically advanced. Library of Congress records from the 1959 American National Exhibition in Moscow document the famous model kitchen associated with mid-century appliance culture, a reminder that kitchens were also symbols of modern convenience during the Cold War period.
Typical design cues include metal cabinets, laminate counters, chrome-edged tables, colorful appliances, linoleum or resilient flooring, and compact work triangles. Pastel surfaces were common, but not universal. White, wood, stainless trim, red accents, yellow, turquoise, and pale green all appeared in different combinations. For a modern remodel, the goal should be efficient storage, durable worktops, and compatible proportions rather than a literal reproduction of every surface.
Bathrooms
Mid-century bathrooms often used color more confidently than contemporary neutral schemes. Pink, mint, blue, yellow, and gray tile could appear on walls, floors, fixtures, or vanity tops. Colored plumbing fixtures are frequently removed because they feel dated, yet they are also among the clearest surviving signs of a 1950s interior. If the tile is in good condition, preserving it can give the room more architectural value than replacing it with generic white tile.
When original bathrooms need new plumbing or ventilation, keep the layout simple where possible. Square wall tile, mosaic floors, medicine cabinets, modest sconces, and slab-front vanities can bridge period character with modern performance. If colored fixtures are damaged or impractical, echo the palette through tile, paint, or accessories instead of forcing an exact match.
Bedrooms and storage
Bedrooms in many 50s houses were smaller than today’s primary suites, but they often used storage efficiently. Built-in wardrobes, sliding closet doors, and simple casework helped make compact rooms more functional. Rather than enlarging every bedroom, consider whether better closets, lighting, and furniture scale would solve the problem with less structural change.
Colors, materials, and patterns that feel authentic
Color is where many 1950s-inspired renovations go wrong. The decade included candy-colored kitchens and atomic motifs, but it also included restrained modern palettes, natural wood, gray, cream, black, brick, and stone. A convincing 50s house interior usually balances one or two vivid choices with quieter architectural surfaces.
Postwar textile design is an important reference point. The Victoria and Albert Museum’s documentation of postwar textiles shows how modern art, abstract pattern, and new confidence in printed fabrics influenced interiors. That does not mean every room needs boomerangs and starbursts. It means pattern can be graphic, rhythmic, and playful without becoming novelty decor.
| Design cue | Typical 1950s role | Modern update |
|---|---|---|
| Pastel tile or fixtures | Added color to kitchens and bathrooms | Preserve where sound, then pair with warm neutrals |
| Laminate counters | Affordable, cleanable work surfaces | Use period-appropriate laminate or a simple stone with restrained edging |
| Wood paneling | Created warmth in dens and living rooms | Repair, refinish, or use partial paneling instead of darkening every wall |
| Atomic or abstract pattern | Reflected science-age and modern graphic culture | Use on textiles, art, or a small backsplash rather than everywhere |
| Low-profile furniture | Supported casual, horizontal room composition | Choose pieces that respect window lines and room scale |
How to remodel without losing the 1950s character
The most successful updates begin with an inventory. Before demolition, record original flooring, trim, cabinets, doors, hardware, tile, lighting positions, vents, and built-ins. Some elements may not be worth saving, but they still explain the design logic of the house. Removing everything at once can leave the interior with no relationship to its architecture. See also: Building Styles.
Focus first on the features that are expensive or impossible to replace: original wood floors, well-made built-ins, stone fireplaces, vintage tile in good condition, solid doors, and room proportions. These elements create authenticity more reliably than newly purchased retro accessories. If a feature is damaged, consider repair, partial replacement, or reinterpretation before choosing full removal.
Energy upgrades require special care. New windows, insulation, heating, cooling, and electrical work can improve comfort, but they can also change wall depths, trim profiles, and daylight quality. If original steel or wood windows are central to the design, compare repair and storm-window options with full replacement. Where replacement is necessary, choose profiles that keep the glass area and frame rhythm close to the original.
Kitchens and baths usually need the most intervention. A practical compromise is to keep the original room location, circulation, and general cabinet scale while upgrading appliances, ventilation, plumbing, and lighting. In a small 1950s kitchen, removing one wall may help, but it may also erase the period plan. A wider doorway, pass-through, or breakfast counter can sometimes create openness while retaining the original room structure.
Furniture and lighting choices that work today
Furniture should support the architecture rather than compete with it. Look for tapered legs, slim arms, modest upholstery, sculptural wood frames, and storage pieces with simple fronts. Walnut, teak, birch, oak, and painted finishes can all work, depending on the house. Avoid filling every room with famous mid-century silhouettes; a mix of original, vintage-inspired, and contemporary pieces feels more natural.
Lighting is another place to balance character and performance. Saucer pendants, cone shades, globe fixtures, tension pole lamps, and simple sconces can all suggest the period. Modern LED technology can sit inside these forms if the color temperature is warm and the light is layered. A single bright ceiling fixture rarely flatters a low 1950s room. Use table lamps, wall lights, under-cabinet lighting, and picture lights to create depth.
Window treatments should respect the horizontal lines of the house. Simple curtains, woven shades, vertical drapery panels, or understated blinds usually work better than heavy swags. If the room has a picture window, avoid blocking the full opening. That large view was often one of the main design gestures of the house.
Common mistakes in 50s house interior updates
- Making every surface retro. A few strong period references are more convincing than a room filled with themed props.
- Removing good original tile too quickly. Mid-century bathroom tile is difficult to recreate with the same proportions and color depth.
- Using oversized furniture. Many 1950s rooms are compact, so large sectionals and tall storage units can overwhelm them.
- Ignoring the ceiling height. Low ceilings need careful lighting, restrained crown details, and horizontal composition.
- Replacing character with generic luxury finishes. Marble-look slabs, ornate trim, and oversized fixtures can fight the modest clarity of the architecture.
- Confusing 1950s with all mid-century decades. Late 1960s colors, shag textures, and heavier psychedelic patterns may not suit an early or mid-1950s house.
Frequently asked questions
What colors were common in a 50s house interior?
Common choices included pink, turquoise, mint green, pale yellow, red, cream, gray, black, and natural wood tones. The exact palette depended on the room, region, budget, and whether the house leaned traditional or modernist.
Is a 1950s interior the same as mid-century modern?
Not always. Mid-century modern is a design movement associated with clean lines, modern materials, and indoor-outdoor living, but many 1950s houses were more modest or traditional. A 50s interior may include mid-century modern features without being a fully modernist home.
Should original pink or blue bathroom tile be removed?
If the tile is structurally sound, it is worth considering preservation. Colored bathroom tile is a defining 1950s feature. If plumbing or waterproofing problems require removal, you can still reference the period through tile size, layout, color, and fixtures.
How can a 1950s kitchen feel current?
Keep the efficient layout, compact scale, and cheerful material language, then upgrade appliances, lighting, ventilation, and storage. Period-aware laminate, simple cabinet fronts, chrome or brushed metal details, and durable flooring can make the room functional without losing its identity.
What is the simplest way to add 50s character to a plain room?
Start with scale and shape. A low sofa, a wood credenza, a globe or cone lamp, a graphic textile, and one controlled accent color can suggest the period without turning the room into a themed set.