
How to Build a DIY Rustic Barnwood Mirror
How to Build a DIY Rustic Barnwood Mirror
Making a rustic barnwood mirror can be a fun and satisfying project. It mixes hands-on skills with simple style choices. People who know a lot about home decor or working with wood often like these mirrors for spots like bathrooms or entryways. The natural feel of the wood pairs well with everyday use. This guide walks through every part of building a barnwood mirror. It starts with finding the right materials and ends with small finishing touches. You’ll get practical tips on building methods and how to make it look good.
What Makes Rustic Barnwood Ideal for Mirrors?
Barnwood stands out as a top pick for rustic mirrors due to its worn texture and soft natural color. The rough surface shows signs of age and weather. Each board has its own special look. You can grab old boards from barns, fences, or worn-out floors. These pieces often show old saw cuts, nail spots, and different wood patterns that new wood just doesn’t have. In a bathroom, this kind of wood adds a cozy touch. It helps offset the chill from glass and metal parts around it. I remember once using some old fence wood, and it really warmed up a plain vanity area.
Characteristics of Authentic Barnwood
Real barnwood usually comes from strong woods like oak or chestnut. Its solid build means it lasts a long time. The small flaws make it interesting. When picking boards, aim for even thickness. But it’s okay to have a few rough spots. They add to the real feel. Clean the wood well to get rid of dirt or bugs. Just don’t sand it too much. You want to keep that old, weathered look that makes it special.
Why Reclaimed Wood Matters
Choosing reclaimed wood helps the environment. It’s also a smart way to get that old-time look without years of waiting. This cuts down on trash and keeps old stories alive by reusing stuff that might get thrown away. For folks who design green homes, this fits right in with eco-friendly ideas. It keeps the style strong too. In my experience from a few projects, reclaimed pieces often surprise you with hidden knots or colors that pop up after cleaning.
How to Prepare Materials Before Assembly?
Getting your materials ready is important before you build the mirror frame. This helps make sure everything fits right and stays solid. First, measure the mirror you have. That sets the size for the inside of the frame. Next, cut the barnwood to match. Use a miter saw to make 45-degree cuts for neat corners. Take your time here. Rushing can lead to uneven edges that show later.
Cleaning and Treating the Wood
Old wood needs some care even if it’s reclaimed. This is true before you bring it inside. Wash each board with gentle soap and water. This removes built-up dirt. Then, let it dry all the way. If the mirror goes in a damp spot like a bathroom, add a protective layer. Pick something like polyurethane or tung oil. It guards against water harm. Skip shiny finishes. Go for flat or soft ones instead. They keep the rough charm intact.
Cutting and Joining Techniques
Getting the cuts right matters a lot for the frame’s corners. Use clamps and braces to hold things steady as you put it together. Apply glue and nails to the joints. For extra hold, try pocket-hole screws on the back side. They stay out of sight. This builds a tough frame that can handle a heavy mirror without trouble. I’ve seen frames last over 10 years in busy homes when done this way.
How Do You Assemble the Frame?
With materials set, putting the frame together is pretty direct. But you need to watch the details closely. First, place all four sides on a level spot. Put them around the mirror glass to check the fit. Don’t glue until it looks good.
Gluing and Fastening
Put wood glue on each cut edge. Join the corners with care. Wipe off any extra glue right away using a wet cloth. Add strength with small nails or metal brackets. It depends on what you like. Many skilled builders choose hidden fasteners. They keep the front looking smooth and even.
Adding Backing Support
Fix a thin plywood piece to the back of the mirror. Use tiny nails or glue that’s safe for glass. This adds firmness. It also keeps the edges from getting chipped. That’s key in busy places like bathrooms or hallways. Sometimes, in humid spots, I’ve added a bit more adhesive around the edges for peace of mind.
How Should You Finish Your Rustic Mirror?
The final touches decide how well the piece holds up and how it catches the eye. You want to bring out the wood’s own colors without covering them up. Think about the room’s light too. Natural daylight can make the grain stand out more.
Staining Versus Natural Finish
For more color depth, try oil-based stains in earthy shades like walnut or honey oak. Use them lightly. This way, the wood’s patterns still show through. Or, skip the stain altogether. Just add a clear sealant. This keeps things true to the old style. It’s great for bathrooms where the wood’s soft look goes well with tiles or stone. In one setup I helped with, the natural finish blended perfectly with beige counters.
Protective Coating Application
If you stain it, put on two layers of protective coat. Wait enough time between each one to dry. You can also rub in a light wax layer at the end. Buff it for a subtle shine. This keeps the rough feel while adding a handmade vibe. It’s better than a glossy store-bought look. Aim for about 24 hours drying per coat to avoid sticky spots.
Where Should You Place Your Rustic Barnwood Mirror?
Where you put the mirror changes how it works and feels in the room. In bathrooms, hang it over the sink area. There, soft light helps with reflections. But keep it away from spots that get splashed a lot, like near the shower.
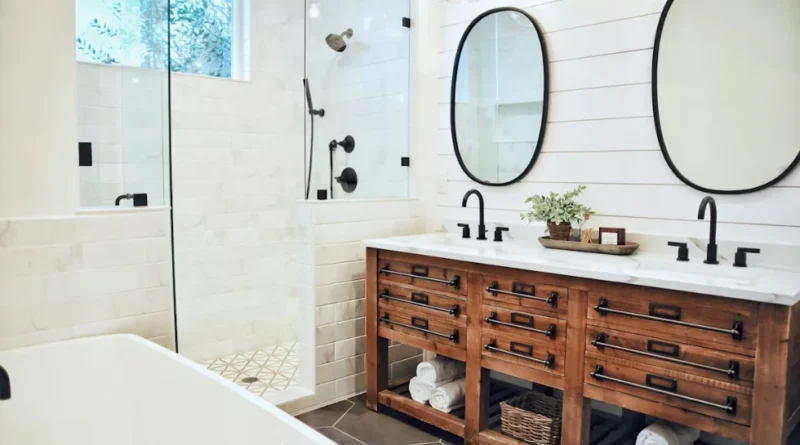
Bathroom Integration Tips
Match the mirror with simple metal lights, such as black iron lamps or soft brass faucets. This mixes the wood’s toughness with cleaner lines. Make sure the room has good air flow. It stops moisture from building up on the frame. Even with sealant, too much dampness can twist the wood over time. From what I’ve seen in real homes, placing it 5-6 feet high works best for most adults.
Beyond Bathrooms: Other Applications
A barnwood mirror fits well in entryways or living areas too. It acts as a main decor piece. The wood bounces light around textured walls or big open spaces. Builders sometimes lean big versions against a wall instead of hanging them. This gives a laid-back yet classy touch. It’s common in modern rustic setups. For example, in a cozy foyer, it can make the space feel twice as big with the right angle.
FAQ
Q1: What type of wood works best for rustic mirrors?
A: Hardwoods like oak, maple, or reclaimed barn planks are ideal because they resist warping while offering rich grain patterns suited to rustic aesthetics. These choices hold up well in daily use.
Q2: Can reclaimed barnwood be used safely in humid bathrooms?
A: Yes, provided it’s properly cleaned, sealed with moisture-resistant finish, and installed away from direct water exposure areas such as showers. Just check the seal every year or so.
Q3: How do you prevent mirror backing from deteriorating over time?
A: Use plywood support treated against moisture plus adhesive rated safe for glass surfaces; this combination maintains structural integrity long-term. Adding a vapor barrier helps in steamy spots.
Q4: What finish best preserves natural wood tone?
A: Matte polyurethane or beeswax finishes protect without altering color significantly while enhancing tactile depth characteristic of aged timber surfaces. They feel warm to the touch.
Q5: Are there design variations beyond rectangular frames?
A: Absolutely—round or arched silhouettes framed in barnwood introduce softer geometry complementing minimalist spaces while retaining vintage charm typical of rustic mirrors for bathroom décor trends today. Try sketching a few ideas first to see what fits your wall.